Pages

Showing posts with label Bob's Red Mill Gluten-Free All Purpose Flour. Show all posts

Tuesday, September 13, 2011

Zucchini Bread

It's amazing how quickly time flies when you get caught up in other things (aka work)!!

A few weeks ago a friend of ours gave us a big zucchini that I honestly had no idea what to use for or even how to cook with it.  I will say that I used part of it in the broccoli chicken casserole that I typically make, but replaced the broccoli with sauteed zucchini.  But...I ended up having extra zucchini left over that I had absolutely no idea of what to use it for or to cook it with.  So, I decided that Andrew needed something different for breakfast and made him a couple of loaves of gluten-free zucchini bread.

For those of you who cook "normally" and don't have to worry about eating gluten-free, here's the website that I used: Mom's Zucchini Bread Recipe.

For those of you who cook gluten-free, here's the amended recipe for you to enjoy!!!

Ingredients:

  • 3 cups all-purpose gluten-free flour (Bob's Red Mill)

  • 2 tsp. Xanthan gum (Bob's Red Mill)
  • 1 teaspoon salt
  • 1 teaspoon baking soda
  • 1 teaspoon baking powder
  • 3 teaspoons ground cinnamon
  • 3 eggs
  • 1 cup vegetable oil
  • 2 1/4 cups white sugar
  • 3 teaspoons vanilla extract
  • 2 cups grated zucchini
  • 1 cup chopped walnuts

Directions:

  1. Grease and flour two 8 x 4 inch pans. Preheat oven to 325 degrees F (165 degrees C).
  2. Sift flour, salt, baking powder, soda, and cinnamon together in a bowl.
  3. Beat eggs, oil, vanilla, and sugar together in a large bowl. Add sifted ingredients to the creamed mixture, and beat well. Stir in zucchini and nuts until well combined. Pour batter into prepared pans.
  4. Bake for 40 to 60 minutes, or until tester inserted in the center comes out clean. Cool in pan on rack for 20 minutes. Remove bread from pan, and completely cool.


It really is relatively easy to do.  Just follow the directions!


Happy eating!!!

Jenni

Saturday, August 13, 2011

Sharing Pictures...

I was in the process of making multiple items for Andrew's meals for the next week or so when I realized that a couple of the pictures on some of the previous postings weren't the greatest or weren't existent.  So...I'm going to share some of them now!

For the recipe for the Cheddar Garlic Biscuits, check out the posting for August 7th!

Gluten-Free Cheddar Garlic Biscuits

For the recipe for the Strawberry Shortcake, check out the posting from July 23rd!

Gluten-free shortcake

Have a great day!!!

Jenni

Monday, August 1, 2011

Apple Dumplings

I've been more curious about baking gluten-free desserts probably more than I should; however, I figure trying out desserts (at least for me) is the best way to start gluten-free baking.  I was contemplating what kind of yummy desserts I could make using Bob's Red Mill Gluten-Free All Purpose Flour with the help of Bob's Red Mill Xanthan Gum.

Anyways, one of the yummiest desserts I remember from growing up are apple dumplings.  The church I grew up in would do a couple of Saturdays creating apple dumplings to sell at the local county fair late in August.  I was also inspired by one of our friends, Laura, whose version of apple dumplings are slightly different than what I had grown up with.

With those two ideas in mind, I decided to create my own version of apple dumplings (using some of their ideas, leaning more towards Laura's idea).

Apple Dumplings

Ingredients:
Directions:
  1. Preheat the oven to 350 degrees Farenheit.
  2. Mix the gluten-free flour, xanthan gum, and salt together.
  3. Add the shortening, which may cause the dough to become crumbly.
  4. Add 1 to 1 1/4 cups of milk.  Mix together.
  5. Peel, core, and cut the apples into chunks.
  6. Mix the sugar and cinnamon together, and slice the 1/2 stick of butter into slices.
  7. Take part of the dough and roll it out to the desired thickness, preferably large enough to cover the bottom and the sides of an 8 in. by 8 in. baking pan.
  8. Place the dough into the bottom of a greased 8 by 8 in squared baking pan.
  9. Put about half of the apple chunks into the bottom of the dough.
  10. Sprinkle about half of the sugar/cinnamon mixture over the apples.
  11. Place several slices of the butter on top of the apples and sugar/cinnamon mixture.
  12. Take about half of the dough that's leftover and roll out with a rolling pin.  Place over the layer of apples.
  13. Use the last of the apples on the middle layer along with the sugar/cinnamon mixture as well as the butter slices.
  14. Take the last bit of the dough, roll out to cover the top.  Lightly sprinkle the sugar/cinnamon mixture on top of the last layer of dough.
  15. Place into the oven for about an hour until it is done!!
Serve with ice cream!!!!

I will say the pictures I am about to post don't necessarily do it justice, but it does taste very yummy.  I will be honest too that I sincerely do not own a rolling pin, so the dough didn't get nearly as thin as I wanted.  Also, I'd recommend using the extra 1/4 cup of milk so that the dough doesn't become as crumbly.

Apple Dumplings Pre-baked

Apple Dumplings Baked

Apple Dumplings Before Yummy Eatng time!!!
Like I said...the pictures don't do it justice! I hope you enjoy!!!

Happy Eating!!!

Jenni

Thursday, July 28, 2011

Bob's Red Mill Gluten-Free All Purpose Flour

Today, I don't exactly have a recipe per se to share with you; however, I do have a product I'd like to share.  Andrew and I have been using Bob's Red Mill Gluten-Free All Purpose Flour a couple of times to replace the flour we had been using.   We've used the flour for shortcake for strawberry shortcake and crust for pizza.  You will want to use it in combination with the Xanthan Gum from Bob's Red Mill (or someplace else) as a replacement for the gluten in other flours.  Typically, you will want to do about 1 cup of flour to every 1 teaspoon of the Xanthan gum.

You can find any Bob's Red Mill products at the following places (there may be more!):
  • Kroger (in the natural foods section)
  • Whole Foods (in the baking section)
  • Bob's Red Mill website
  • Amazon (type in Bob's Red Mill)
Happy eating!!

Jenni

      Saturday, July 23, 2011

      Strawberry Shortcake

      This evening I happened to fix one of the casseroles (I'll post that recipe later) I prepared earlier in the week as dinner.  As the casserole was baking, I was thinking, "I really need to try a dessert with the gluten-free flour that we have to see how it turns out."  Well...I decided to do just that.  I had peered into the refrigerator and remembered that we had strawberries and I didn't want them to go bad before I was able to use them.  So...strawberry shortcake it was!!!

      I typically use a recipe from a cookbook that I was given at Christmas within the last 5 years or so.  It's actually really yummy (gluten-free or not)!  It comes from the cookbook, Taste of Home Mom's Best Meals and was entered by Karen Wingate of Kansas.  The recipe is called (not by me, but by the original creator) "Mom's Strawberry Shortcake."

      The recipe calls for:
      • 2 eggs
      • 1 1/2 cups sugar (divided)
      • 1 cup gluten-free all-purpose flour (my slight amendment)
      • 1 teaspoon baking powder
      • 1/4 teaspoon salt
      • 1 teaspoon xanthan gum (my amendment)
      • 1/2 cup milk
      • 1 tablespoon butter
      • 1 teaspoon vanilla extract
      • 1 to 1 1/2 quarts fresh strawberries, sliced
      • Whipped cream
      • Mint leaves, optional
      Since I used Bob's Red Mill Gluten-free All-Purpose Flour, I added a teaspoon of Xanthan Gum (also from Bob's Red Mill) to help replace the gluten from the regular all purpose flour.  Both of those can be found in Kroger.  If you have someone in your family who happens to be diabetic, you can also replace the sugar with Splenda or any other sugar alternative you're willing to try cooking with.

      The rest of the directions include (with some of my side-notes):
      1. In a mixing bowl, beat eggs on medium speed for 3 minutes.  Gradually add 1 cup sugar, beating until thick and lemon-colored.
      2. Combine flour, baking powder and salt; beat into the egg mixture.
      3. Heat milk and butter just until butter begins to melt.  
      4. Beat into batter with vanilla (batter will be thin).
        • Trust me...it'll be thin!  It was thin pre-gluten-free and now gluten-free.
      5. Pour into a greased 8-in. square baking pan.
        • This is actually the best type of pan to use in order for it to cook evenly and completely.
      6. Bake at 350 degrees for 25 minutes or until a toothpick inserted near the center comes out clean.
      7. Cool for at least 10 minutes; then, cut into squares (about 9 servings).
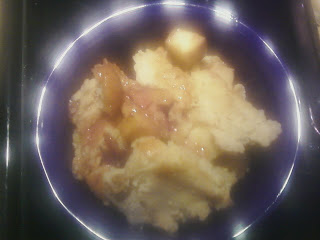
      8. Dish up the shortcake, strawberries, and whipped cream with the garnish of mint leaves (if you choose).
      The recipe continues on with other steps between 7 and 8, but I don't normally do the last portions (so I won't give them to you).  Usually while the shortcake is baking, I cut up the strawberries into small pieces and use the remaining sugar to mix in with the strawberries.  I put them back into the refrigerator until we're ready to eat them.
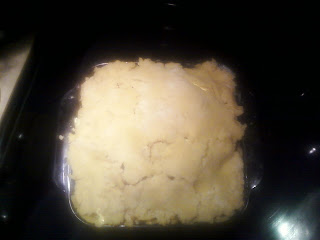
      Shortcake

      Yes, I realize that I didn't do a couple of things from the recipe that I just gave. First of all, I didn't use an 8-in. squared pan because the only one I have was being used for the casserole (recipe later to be posted).  Secondly, you're probably wondering why the center caved in a little.  Well, I actually had ended up letting the shortcake in the oven for 27 minutes rather than the 25 to compensate for the difference in dishes.  Honestly...I probably should've let it go for about 3 minutes longer (making the total 30 minutes for this dish size).  I will say that although the middle flopped a little, the rest of it was completely cooked and it was quite yummy. When I use the 8-in. squared pan, the shortcake does turn out fully cooked within the 25 minutes called for in the recipe.

      I will try to have more pictures for the next time I fix it!!  You should try it out!  Enjoy!!

      Jenni